
How to mint NFTs (ETH, CROWN)
Go to ADOT website www.adotmarketplace.com

Select "Drops" menu

Explore the Drops section and select the desired ones
Once entered drops menu, you can explore by scrolling down and you will find information about the NFT drops that are scheduled or available.
Review the available NFT drops and choose the one you wish to mint. Click on the specific drop to access more details

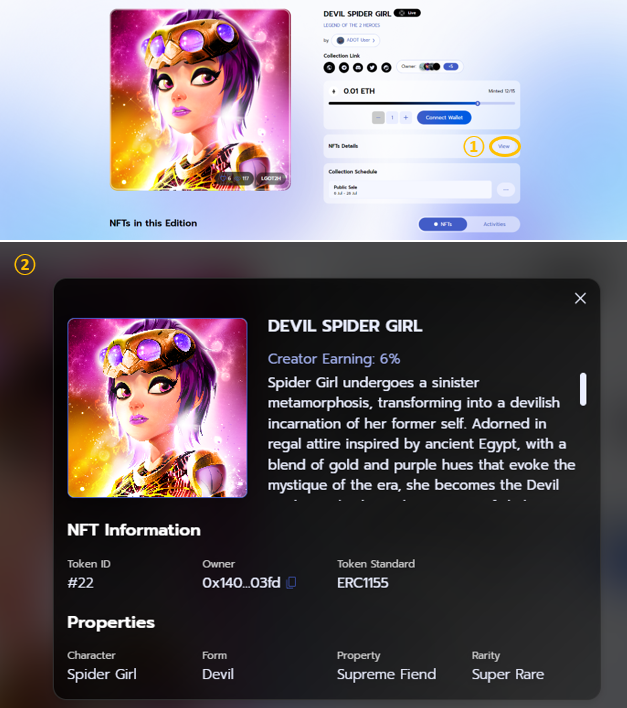
Read the Drop details
Within the drop details, you will find important information such as the name, description, artwork, edition size, price, and you can click “View” to review any additional attributes or features associated with the NFT.
Connect wallet
Before minting an NFT you need to connect your web3 wallet such as MetaMask wallet by click “Connect Wallet”.


Mint the NFT
a. ETH case
Once you have connected the wallet and confirmed your eligibility, proceed with minting the NFT. Click on the "Mint" button provided on the drop page.

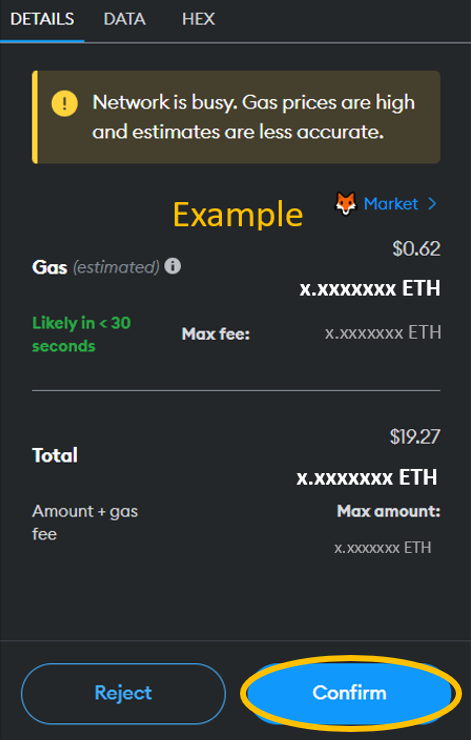
Pay the Required Fee: Ensure you have sufficient ETH for the transaction and gas fees in your connected wallet to cover this fee. After you review it, click the “Confirm” button.
b. CROWN Token case (You can refer to "How to add Crown Token to your wallet")
Once you have connected the wallet and confirmed your eligibility, proceed with minting the NFT. Click on the "Mint" button provided on the drop page.

You need to set a maximum spending cap of CROWN Token (which should be at least equal to the price of the NFT you want to mint) and then you need to approve CROWN Token usage before minting an NFT by clicking on the “Approve” button.

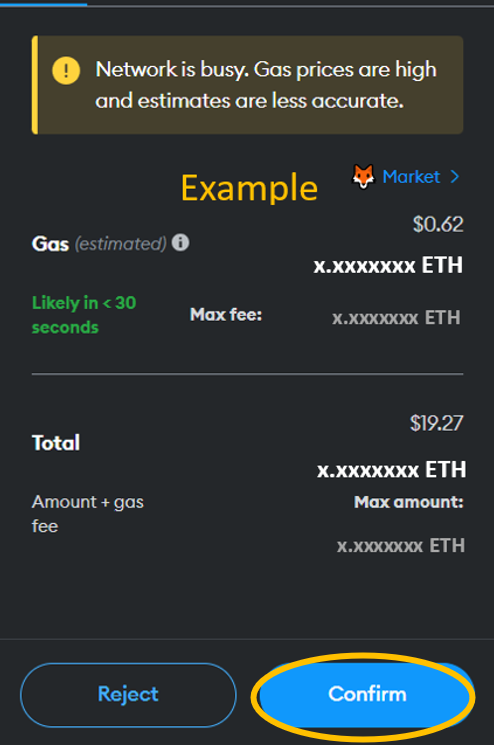
Pay the Required Fee: Ensure you have sufficient Crown Token for the transaction and gas fees in your connected wallet. After you review it, click the “Confirm” button.
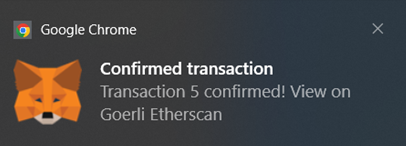
Confirm and verify the transaction
After submitting the transaction, monitor your wallet or the marketplace for updates on the transaction status as confirmation times may vary based on the blockchain used.
NFT Ownership
After the transaction is confirmed, you will become the owner of the minted NFT. You can view your NFTs by clicking “My Dashboard” menu.
And then click on “NFT Assets.” to view your assets.

You can now manage your minted NFTs within your wallet or the marketplace. This includes viewing, showcasing, transferring, or listing them for sale or auction, if desired.
Last updated